BBC Microbit
![]()


BBC micro:bit
Neopixel Action
Introduction
The photograph shows a single Neopixel LED on the breadboard.
A Neopixel is an LED package that contains a red, green and blue LED. They can be chained together but you'd need a separate power supply with more than a couple of them.
I had a handful of these Neopixels left and we used them in class for some exercises in MicroPython.
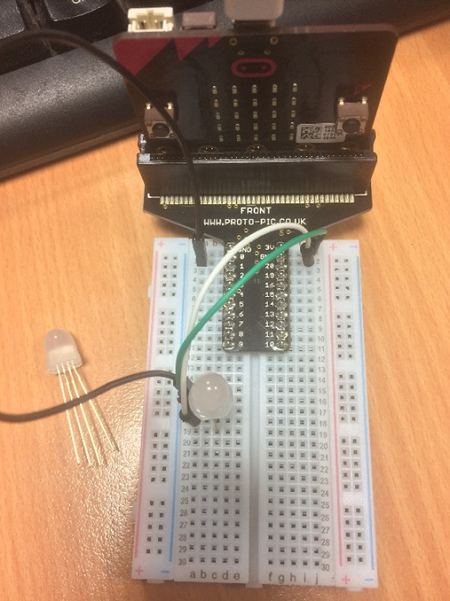
You can see one of the LEDs next to the breadboard. It has 4 legs and one of them (3rd from the left in this photo) is noticeably longer than the others.
If you place one of these on the table as you see in this photo, the legs of the LED package correspond to,
- DATA IN - connect to pin0
- VCC - connect to 3V
- GND - connect to GND
These LEDs are likely to burn out if connected the wrong way around - if you build the circuit yourself, show your teacher before connecting.
Task 1
Our first job is to check the Neopixel is correctly wired up. Copy and test this program, then read the explanations.
from microbit import *
import neopixel

npix = neopixel.NeoPixel(pin0, 1)

red = (255,0,0)
off = (0,0,0)

while True:
    npix[0] = red
    npix.show()
    sleep(500)
    npix[0] = off
    npix.show()
    sleep(500)
We need to import the Neopixel module to work with neopixels.
The third line defines a chain of neopixels on pin0. Our chain is of length 1.
You define colours as a tuple in the format (r,g,b). The values for r, g and b can be from 0 (off) to 255 (fully on).
The main loop in the program flashes the Neopixel from red to off.
Copy and test this program. Assuming no issues for you with processing colours, you will see that the light flashes green, not red. That is because this Neopixel is a little different to the ones you normally find. For Neopixels, you normally define a colour like this,
(r,g,b)
where the letters r,g and b are replaced by numbers from 0 to 255.
To work with the LED you see in the photograph, you need to define your colours in a different order,
(g,r,b)
Your first task is to correct the assignment statement for the variable red. Make it actually red.
Task 2
Using a number from 0 to 255 means 256 different values. There are 3 colour channels, each with that same number of different shades. All told, that means that you can make,
256 x 256 x 256 = 16777216 different colours.
The following program quickly moves through all of the shades of red,
from microbit import *
import neopixel

npix = neopixel.NeoPixel(pin0, 1)

for r in range(256):
    npix[0] = (0,r,0)
    npix.show()
    sleep(1)
Copy and test this. It's a little dull. Let's add code to see what happens when we bring a little green to the party. The following program is a little blinky. Each blink is all of the shades of green you can blend with each of the shades of red.
from microbit import *
import neopixel

npix = neopixel.NeoPixel(pin0, 1)

for r in range(256):
    for g in range(256):
        npix[0] = (g,r,0)
        npix.show()
You could add another loop for the blue channel, but, even if the delays are removed from the program, it's a long wait before you see any real mixing of the colours. Instead, just get the idea that we can make any colour we like as long as we work out the right mix of red, green and blue light.
Task 3
You can use the colour tools in graphics packages to help work out the colours you want on the LED. This is from Paint,
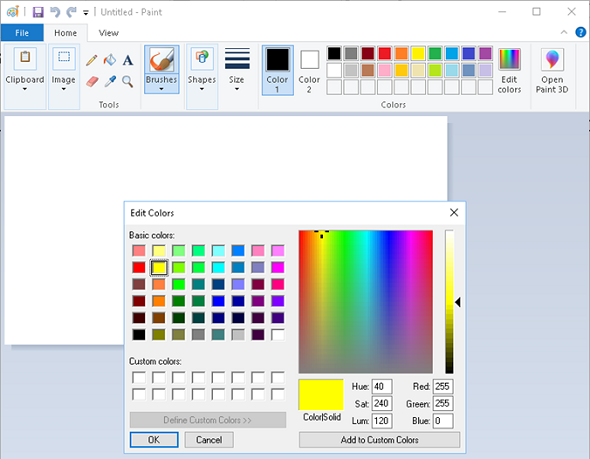
You are looking for the RGB colour values. Select a colour from the palette or by moving the cross. Copy the values you get for the RGB colour.
Using this information, the following program makes the light glow yellow.
from microbit import *
import neopixel

npix = neopixel.NeoPixel(pin0, 1)

yellow = (255,255,0)

npix[0] = yellow
npix.show()
Remember that you are defining your colours with something like,
NameOfYourVariable = (g,r,b)
Your task is to work out the numbers that make the best versions of the following colours,
- Orange
- Purple
- White
Choose two more colours of your own or experiment to find a shade you like and call it what you want. Make a repeating light show of the colours. You can adapt code from Task 1 to set this up once you have worked out the numbers for the colours.
Task 6
If you add an import random statement to the top of you can use a statement like the following to generate a random number.
r = random.randint(0,255)
Write a program that generates a random colour (random amounts of red, green and blue) when the user presses the A button on the micro:bit. Remind yourself of how to detect button presses from one of your previous programs or in the starting off section on Multiwingspan.
Task 7
Imagine that you are using the program you wrote for Task 6 and it generates the most awe-inspiringly beautiful colour that you have ever seen. There''s nothing about the circumstances that would let you know for certain which numbers had produced such stunning beauty.
Add to your previous program. At the start of the program, before you start the while loop you will need to watch out for button presses, set your 3 colour variables to 0.
When the A button is pressed, use these same variables to store randomly generated numbers and change the colour on the Neopixel.
When the B button is pressed, display the values for red, green and blue on the LED matrix. For example,
display.scroll("Red = " + str(r))
would scroll the current value for the red channel. Add two more lines and you have the details you need to reproduce the colour in your own programs.