BBC Microbit
![]()


BBC micro:bit
Building An Electronics Kit
Introduction
If you are interested in experimenting with electronics, you may wish to build up a kit of parts to allow you to do this. This page gives some suggestions as to how to get started and how to avoid overspending.
Look After Your Money
The best way to try things out is at school. If your school has an electronics club, you should try out the equipment there before spending all of your pocket money or pestering your parents to buy parts you may not use very much.
When something costs more than a few pounds, you need to take extra care. You don't need a box full of parts that don't work with the micro:bit or that you can't use for very much. It is better to get a selection of cheaper parts that you can reuse in lots of your projects.
Essentials - Connectivity
The micro:bit has 5 large pins, two of which are used for power. The others, pin0, pin1 and pin2, are GPIO (general purpose input output) pins that you can connect parts to. There are other, smaller pins on the micro:bit that you can connect to on the micro:bit too.
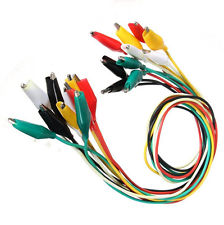
You can use crocodile clips to connect to the larger pins. This is fine for attaching headphones or a buzzer. You will be able to get a button or touch input to work this way too. Expect to pay £2 - 5 for a set of 10 alligator cables.
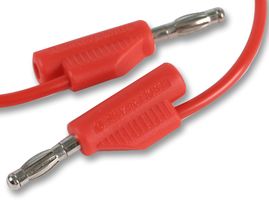
You can connect to the larger pins using 4mm Banana Jack cables. Without further adapters, you are only going to be able to use this to set up touch input with conductive dough. These cables can be quite expensive.
Although it seems the most expensive item, the most flexible way to connect parts to the micro:bit is with an edge connector. This will need you to have a few other items too.
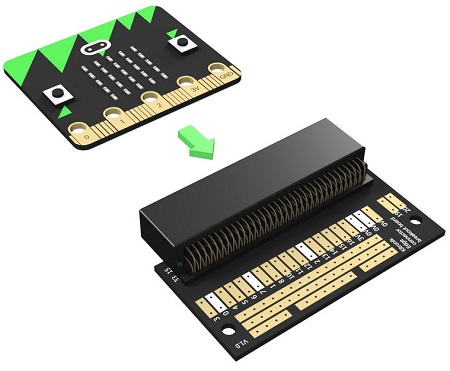
The image above is of a Kitronik edge connector which costs around £5. There are a couple of others available now, including this one from Proto-Pic,
This edge connector costs a lot more but has the pins routed more nicely. It stands up on a breadboard too.
With an edge connector, you need a few more parts to be able to connect electronics,
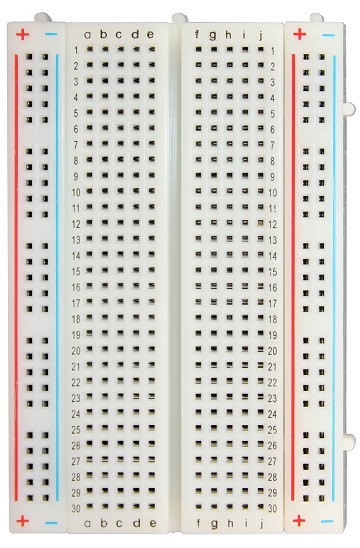
- Solderless breadboard
- Male - Female Jumper Cables
- Male - Male Jumper Cables
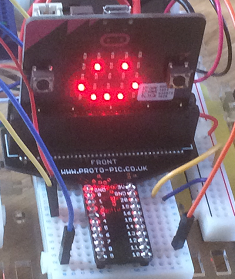
You can place components in the solderless breadboard and connect them to each other and the micro:bit using the jumper cables. This is what you see in many of the connection and circuit diagrams on this site. The edge connector has male pins pre-soldered to it. You need male-female jumper cables to connect from the solderless breadboard to the edge connector. The male-male cables are to connect other parts of the circuit. You would need both of these.
In summary, the connectivity part of your kit would probably need to include the following items,
| Item | Approx. |
|---|---|
| Edge Connector | £5 |
| Solderless breadboard | £2 |
| Male - Female Jumper Cables | £2 |
| Male - Male Jumper Cables | £2 |
Kitronik sell a proto-typing kit for the micro:bit that comes in at around £15. It has all of these parts and some perspex board to mount the stuff on. That is not bad value for money but you can save a few quid if you can live without a board to mount things on.
Other Parts
At over £10 just to get connected, you need to make good decisions about the components you choose. Here is a list of things you can buy cheaply, in small quantities, and connect easily to the micro:bit. Dozens of projects are possible with just these things,
| Item | Cost | Description |
|---|---|---|
| LEDs | £1.30 (10 w/ resistors) | 3mm or 5mm LEDs are fine. You will need resistors to connect these safely. For this price, you can get 10 LEDs and resistors rated at 220 Ohm or 330 Ohm. Packs of assorted colours might be the best way to save a few pennies. |
| Buzzer | £1.20 | The buzzer needs to be suitable for 3V. A passive buzzer is the type you can play a tune with. An active buzzer only generates one tone. |
| RGB LED | 60p | A single LED package that allows you to display a massive range of colour shades. |
| Push Buttons | £2 (10) | 6mm or 12mm PCB mount push buttons will work well. You will need a 10K Ohm resistor for each button you connect. |
| Trimmer Potentiometer | 50p | A variable resistor. You rotate a knob to change the resistance. Cheaper is better when experimenting. |
| Resistors | 60p for 100 | For LEDs, a resistor at 220 or 330 Ohm is fine. For push buttons and other switches, 10K Ohm resistors are needed. Resistors are less than a penny each when bought in sets of 100. |
| Light Dependent Resistor | 60p | You would also need a 10K Ohm resistor to make a voltage divider. These are good for sensing changes in ambient light. |
| 74HC595 Shift Register | 70p | This integrated circuit allows you to connect 8 outputs to the micro:bit and control them using 3 GPIO pins. |
Conclusion
For £15-20, you can purchase a reasonable kit of parts to allow further experimentation with the micro:bit. Whilst there are lots of expensive items that you can connect and use with the micro:bit, it makes sense to make your way with a basic kit first. If you are still interested in doing more when you have tried out all of these parts in your projects, you will be in a position to make more sensible decisions about your future purchases.