BBC Microbit
![]()


BBC micro:bit
Scroll pHAT
Introduction
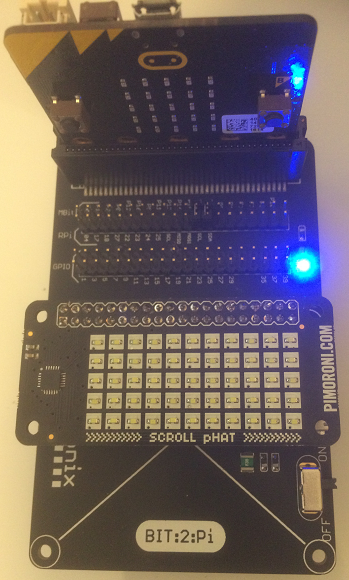
The Scroll pHat is a Raspberry Pi breakout board made by the company Pimoroni. It is an 11x5 matrix of LEDs, driven by an IS31FL3730 integrated circuit. You use i2c to connect to it.
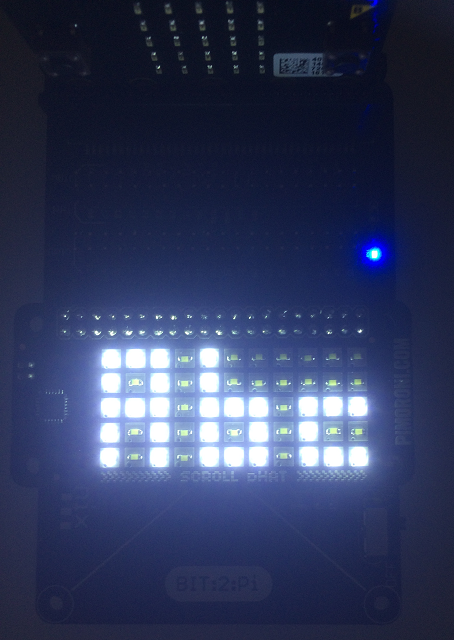
Apart from the joy of making something work, you get to scroll your pixel output across a slightly wider and much brighter display. Here it is mounted on a 4Tronix Bit:2:Pi, which handles all of the power connections. You could do also do this on a breadboard as long as you power the 5V pin sensibly.
Circuit
I did this on the Bit:2:Pi as you see in the image. There you just make sure you have 19 and 20 jumpered horizonally. Otherwise,
Pin Connections
| Connection | Raspberry Pi | micro:bit |
|---|---|---|
| Power LED | 5V | 5V |
| Power IC | 3V3 | 3V |
| Ground | GND | GND |
| Data | Pin 2 | Pin 20 |
| Clock | Pin 3 | Pin 19 |
Programming
Getting the LEDs on an off in the right places wasn't much trouble. The Pimoroni library got me there pretty quickly. Displaying text and scrolling wasn't plain sailing. Here is the full listing, explanation follows.
from microbit import *

class ScrollP:

    font = [0x0,0x17,0xc03,0x2bea,0x6a76,0x2889,0x6aaa,0x3,0x45c0,0x1d1,0xc6,
            0x11c4,0x38c,0x1084,0x10,0xc98,0x7e3f,0x3e2,0x5ebd,0x7eb5,0x790f,
            0x76b7,0x76bf,0x7c21,0x7ebf,0x7eb7,0x140,0x340,0x4544,0x294a,0x1151,
            0x1ea0,0x5ebf,0x7cbf,0x6ebf,0x463f,0x3a3f,0x56bf,0x4bf,0x763f,0x7c9f,
            0x47f1,0x3e08,0x6c9f,0x421f,0x7cdf,0x709c,0x7e3f,0x1cbf,0x7b2e,0x6cbf,
            0x76b7,0x7e1,0x7e1f,0x3e0f,0x7d9f,0x6c9b,0x7e97,0x4eb9,0x47e0,0x6083,
            0x3f1,0x1826,0x4210,0x821,0x7298,0x729f,0x529c,0x7e9c,0x534c,0x17c4,
            0x7ab7,0x709f,0x3a0,0x3608,0x699f,0x3e0,0x6198,0x6098,0x7a5e,0x1cbf,
            0x7ca7,0x109e,0x26b2,0xbe2,0x721c,0x320c,0x330c,0x5114,0x1b16,0x4384]

    def __init__(self):
        self.ADDRESS = 0x60
        self.buffer = bytearray([0] * 11)
        self.offset = 0
        # set 5x11 mode
        self.write_reg(0,0x03)
        self.set_brightness(32)
        self.show()

    def write_reg(self,reg,value):
        i2c.write(self.ADDRESS, bytes([reg,value]), repeat=False)

    def set_pixel(self, x,y,value):
        if value==1:
            self.buffer[x] |= (1 << y)
        else:
            self.buffer[x] &= ~(1 << y)

    def set_brightness(self,b):
        self.write_reg(0x19,b)

    def show(self):
        data = bytearray([0x01]) + self.buffer + bytearray([0xff])
        i2c.write(self.ADDRESS,data,repeat=False)

    def set_char(self, char, col):
        char3 = self.get_char_bytes(char)
        for i in range(3):
            if i+col<=10 and i+col>=0:
                self.buffer[i+col] = char3[i]

    def get_char_bytes(self,c):
        if ord(c)<32 or ord(c)>122:
            return [0,0,0]
        else:
            return [(self.font[ord(c)-32]>>(i*5)) & 31 for i in range(3)]


    def scroll_msg(self, msg, speed):
        self.clear()
        self.show()
        col = 10
        i = 0
        msg+= "    "
        while i< len(msg)-3:
            while col > -5:
                self.set_char(msg[i],col)
                if col<8:
                    self.buffer[col+3]=0
                    self.set_char(msg[i+1],col+4)
                if col<4:
                    self.buffer[col+7]=0
                    self.set_char(msg[i+2],col+8)
                if col<0:
                    self.buffer[col+11]=0
                    self.set_char(msg[i+3],col+12)
                self.show()
                sleep(speed)
                col -= 1
            col = 0
            i += 1

    def clear(self):
        self.buffer = bytearray([0] * 11)
Here are some examples of how you use the class.
# make an instance
sp = ScrollP()
# define a list of the full character set
charset = "".join([chr(i) for i in range(32,123)])

while True:
    # set the pixels on one by one using the set_pixel method
    for row in range(5):
        for col in range(11):
            sp.set_pixel(col, row, 1)
            # update the display for changes to be seen
            sp.show()
            sleep(100)
    # fade out
    for b in range(255,-1,-5):
        sp.set_brightness(b)
        sp.show()
        sleep(20)
    sleep(500)
    sp.clear()
    sp.show()
    sp.set_brightness(32)
    # set the columns by writing to the buffer
    for i in range(11):
        sp.buffer[i] = 31
        sp.show()
        sleep(250)
    # clear the screen
    sp.clear()
    sp.show()
    sleep(500)
    # set the rows by writing to the buffer
    for r in range(5):
        for i in range(11):
            sp.buffer[i] |= 1<<r
        sp.show()
        sleep(250)
    sp.clear()
    sp.show()
    sleep(500)
    # scroll some messages
    sp.scroll_msg("Bazinga! Let your micro:bit talk back.",50)
    sp.scroll_msg(charset,50)
No Text Version
The font takes up a decent chunk of space. If you are just taking advantage of the larger matrix, then you want to take out all of the stuff to do with text. That gives you a shorter block of code,
from microbit import *

class ScrollP:

    def __init__(self):
        self.ADDRESS = 0x60
        self.buffer = bytearray([0] * 11)
        self.offset = 0
        # set 5x11 mode
        self.write_reg(0,0x03)
        self.set_brightness(32)
        self.show()

    def write_reg(self,reg,value):
        i2c.write(self.ADDRESS, bytes([reg,value]), repeat=False)

    def set_pixel(self, x,y,value):
        if value==1:
            self.buffer[x] |= (1 << y)
        else:
            self.buffer[x] &= ~(1 << y)

    def set_brightness(self,b):
        self.write_reg(0x19,b)

    def show(self):
        data = bytearray([0x01]) + self.buffer + bytearray([0xff])
        i2c.write(self.ADDRESS,data,repeat=False)

    def clear(self):
        self.buffer = bytearray([0] * 11)
Driving The Display
I followed the Pimoroni library at first, just following the code from the init method and making sure that the same values were being written to registers. The class has a 11 byte buffer, with each byte representing a column on the display. The rightmost 5 bits of each of the bytes represents which LEDs should be on. All tinkering with the pattern of on/off LEDs is done with the buffer. When that is finished, the buffer is written to the correct register on the IC. This is done with the show() method.
The Font
I had started by following the Pimoroni libary and tweaking the statements for the micro:bit. That was fine up until I wanted to display and scroll text the way that was intended with the display. The font used in the libary is a dictionary, with the keys being the ASCII numbers of the character being defined as a list. The widths of the characters vary and that makes for a nice font, even with so few pixels. This was just a little large. That meant either reducing the number of characters in the character set for the display or finding another way to finding another way to store and represent characters.
I found quite a few sites with downloadable 3x5 font definitions. I took one that had a fixed with for each character and was defined as 3 bytes per character for characters from 32 to 122. Since we only need 5 bits for each character, I decided to use a 16 bit integer for each character with 5 bits for each of the 3 columns needed to store a character.
I used the Python code below to compact the font in the bit pattern that I wanted. I ran this in a full Python shell, not on the micro:bit. That gives a font definition that could be copied and pasted from the Python shell to my code in Mu.
# original 3 byte font
font = [0x00,0x00,0x00,0x17,0x00,0x00,0x03,0x00,0x03,0x0A,0x1F,0x0A,0x16,
        0x13,0x1A,0x09,0x04,0x0A,0x0A,0x15,0x1A,0x03,0x00,0x00,0x00,0x0E,
        0x11,0x11,0x0E,0x00,0x06,0x06,0x00,0x04,0x0E,0x04,0x0C,0x1C,0x00,
        0x04,0x04,0x04,0x10,0x00,0x00,0x18,0x04,0x03,0x1F,0x11,0x1F,0x02,
        0x1F,0x00,0x1D,0x15,0x17,0x15,0x15,0x1F,0x0F,0x08,0x1E,0x17,0x15,
        0x1D,0x1F,0x15,0x1D,0x01,0x01,0x1F,0x1F,0x15,0x1F,0x17,0x15,0x1F,
        0x00,0x0A,0x00,0x00,0x1A,0x00,0x04,0x0A,0x11,0x0A,0x0A,0x0A,0x11,
        0x0A,0x04,0x00,0x15,0x07,0x1F,0x15,0x17,0x1F,0x05,0x1F,0x1F,0x15,
        0x1B,0x1F,0x11,0x11,0x1F,0x11,0x0E,0x1F,0x15,0x15,0x1F,0x05,0x01,
        0x1F,0x11,0x1D,0x1F,0x04,0x1F,0x11,0x1F,0x11,0x08,0x10,0x0F,0x1F,
        0x04,0x1B,0x1F,0x10,0x10,0x1F,0x06,0x1F,0x1C,0x04,0x1C,0x1F,0x11,
        0x1F,0x1F,0x05,0x07,0x0E,0x19,0x1E,0x1F,0x05,0x1B,0x17,0x15,0x1D,
        0x01,0x1F,0x01,0x1F,0x10,0x1F,0x0F,0x10,0x0F,0x1F,0x0C,0x1F,0x1B,
        0x04,0x1B,0x17,0x14,0x1F,0x19,0x15,0x13,0x00,0x1F,0x11,0x03,0x04,
        0x18,0x11,0x1F,0x00,0x06,0x01,0x06,0x10,0x10,0x10,0x01,0x01,0x02,
        0x18,0x14,0x1C,0x1F,0x14,0x1C,0x1C,0x14,0x14,0x1C,0x14,0x1F,0x0C,
        0x1A,0x14,0x04,0x1E,0x05,0x17,0x15,0x1E,0x1F,0x04,0x1C,0x00,0x1D,
        0x00,0x08,0x10,0x0D,0x1F,0x0C,0x1A,0x00,0x1F,0x00,0x18,0x0C,0x18,
        0x18,0x04,0x18,0x1E,0x12,0x1E,0x1F,0x05,0x07,0x07,0x05,0x1F,0x1E,
        0x04,0x04,0x12,0x15,0x09,0x02,0x1F,0x02,0x1C,0x10,0x1C,0x0C,0x10,
        0x0C,0x0C,0x18,0x0C,0x14,0x08,0x14,0x16,0x18,0x06,0x04,0x1C,0x10]
# make the first character
z = [0]
# loop for each character defined in the font
for i in range(3,273,3):
    # convert each gruop of 3 to a 16 bit integer
    z = z + [(font[i+2]<<10)+(font[i+1]<<5)+font[i]]
# make a list of hexadecimal strings
y = [hex(i) for i in z]
# print out the list in the format we need
print("["+",".join(y)+"]")
The get_char_bytes method returns a list of the 3 bytes that we want to use in the buffer to write a character on the display.
    def get_char_bytes(self,c):
        if ord(c)<32 or ord(c)>122:
            return [0,0,0]
        else:
            return [(self.font[ord(c)-32]>>(i*5)) & 31 for i in range(3)]
The first line of the method checks if the character is going to be in our character set by looking at its ASCII code. If it is out of range, we return a list of the bytes needed for a space. Otherwise, we need to separate out the 5-bit values from the integer defined in our font list. The list comprehension is a compact way to do that. The 3 in the loop is the number of bytes we are making from the integer.
Displaying the character at a particular place means copying the 3 bytes you get from this method into the parts of the buffer that correspond to the columns where you want the character.
    def set_char(self, char, col):
        char3 = self.get_char_bytes(char)
        for i in range(3):
            if i+col<=10 and i+col>=0:
                self.buffer[i+col] = char3[i]
The if statement is used to make it easier to draw characters that overlap the edge of the display.
Scrolling
In a PC program, I'd probably convert the entire pattern into an array of bytes and show 11 of these at a time, shifting the starting point of each set of 11 I showed by one on each step of the animation. I wanted a spacing column, so I'd add a space every 3 items in my array. Although that would be easier, it does duplicate information already known.
The approach used here is to convert the bytes as and when they are needed for the display.
    def scroll_msg(self, msg, speed):
        self.clear()
        self.show()
        col = 10
        i = 0
        msg+= "    "
        while i< len(msg)-3:
            while col > -5:
                self.set_char(msg[i],col)
                if col<8:
                    self.buffer[col+3]=0
                    self.set_char(msg[i+1],col+4)
                if col<4:
                    self.buffer[col+7]=0
                    self.set_char(msg[i+2],col+8)
                if col<0:
                    self.buffer[col+11]=0
                    self.set_char(msg[i+3],col+12)
                self.show()
                sleep(speed)
                col -= 1
            col = 0
            i += 1
At the start, a space is added to the message. We then set two counters. The variable col is the column where we want to write a character from the message. We start with it in the last column, 10. The variable i is which character we are reading from the message.
At most, there is only enough space for 4 characters to be seen with this spacing, one of those will be entering or leaving the edge. When the first character makes it to column -4,the second character is in position 0. Each time a character is plotted, the characters to its right are plotted. When it makes it off screen, you draw the next one.
Challenges
- Make some nice blinky effects and patterns with the LEDs.
- Work out how to navigate a pixel around the display using buttons or other inputs.
- With a bit of work, you can adapt programs based around the micro:bit matrix to work on the slightly extended matrix. Games based on visual effects might look a little better with a few more pixels. Use the no text version of the class to keep the memory use down.
- Stopwatch, clock, binary clock. Oh yes.
- Display for analog sensor readings. You can safely show 3 digits. Just show 999 as the maximum.
- Have another micro:bit send the messages by radio and scroll them across the screen repeatedly.
- Work out how to store and animate frames across the whole matrix.
- As it stands, the scroll_msg method is blocking for the rest of your program. Once you call it, your micro:bit is busy doing short bursts of action in between longer bursts of sleep. The alternative to this is to write a new method that allows you to show a frame at a time. You could do this by having a field in the class to store the message and some more for your counters. Then you write an update method that shows a single frame based on the counter values before increasing/decreasing them as appropriate. When the whole message has been shown, set the counters back to their starting values and start again.
- You could optimise the display by not showing leading or trailing blank columns in characters. This would need adjustment to the scroll_msg method.