BBC Microbit
![]()


BBC micro:bit
Menu System
Introduction
This page describes a very simple menu system that you can create with the block editor.
The program will just show the number of the option that you chose from the menu. You can use this program as the menu for something more interesting that you create.
The menu page looks like this,
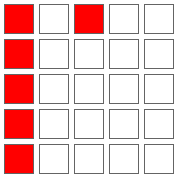
Not very impressive but easy to understand. The 5 dots represent the options in our menu. The dot that is by itself will be blinking. When we press the A button the dot will move down a row. If we press the B button, we are choosing an option from the menu. This will cause a number to be displayed from 0 to 4, showing what has been chosen from the menu.
Programming
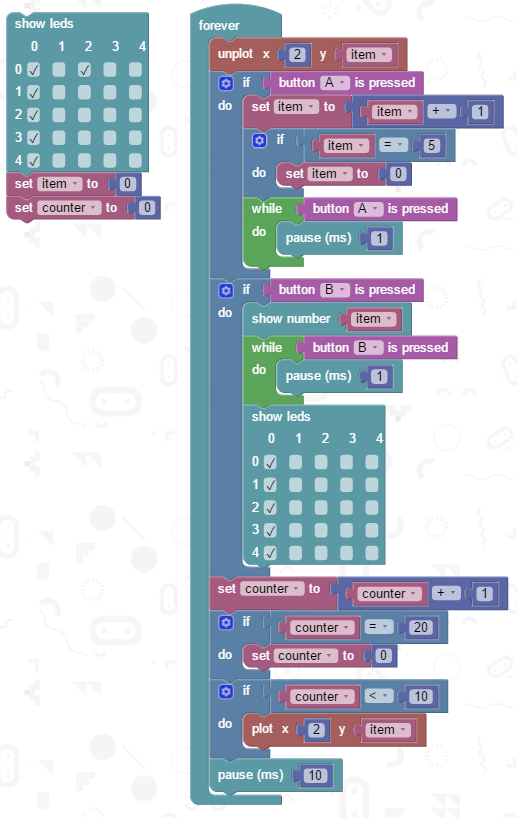
We'll start with a group of loose blocks. These will execute once and set the starting values for our display and our variables.
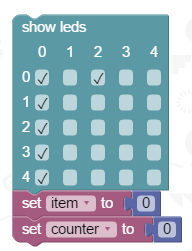
The variable item stores a number from 0 to 4 representing which row the menu pointer is on. The variable counter is used to help us make the menu pointer blink on and off.
Everything except the blocks you have just added goes into a forever loop. The first block you need for that is to unplot the menu pointer pixel.
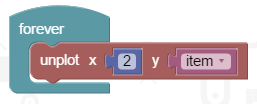
All of the remaining images are of blocks that you add inside this forever loop.
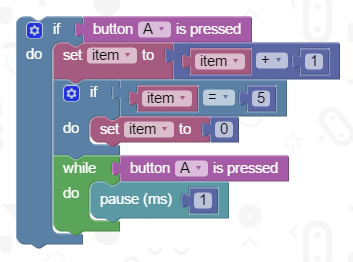
The next thing to do is to check if the user is pressing the A button. If they are, we will increase the number stored in the variable item, to move the pointer down a row. If item is 5, we need to move the pointer back to 0, the top row. We can use a while loop to make the micro:bit wait until the user has released the button.
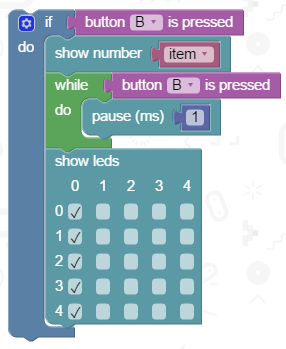
Now for the B button handling. First, the number of the option chosen is shown. This is the part you will want to edit after you have got the program working. A while loop is used to wait until the button is released. Then the menu options are shown again.
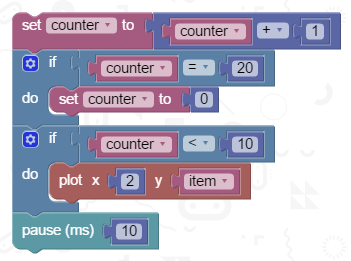
Our last few jobs. We increase the counter by 1. If it has reached 20 we set it back to 0. If the counter is less than 10, we plot the menu pointer pixel, otherwise we don't. This makes it blink. Finally, we have a short pause to make things go smoothly.
All done
Challenges
- Instead of showing the number of the option chosen, show a different image. Use IF..ELSE blocks to work out which image to show. Add a delay before returning to the menu.
- Attach a buzzer or clip on some headphones. Use the menu to choose different sounds or the tempo for a tune.
- Write a program that allows you to choose one of up to 5 options for the micro:bit display. Press A and B together to bring up the options menu until something is chosen. One option might be to scroll your name across the matrix, another option a mini-game, another one a stopwatch and so on.