BBC Microbit
![]()


BBC micro:bit
Extra LEDs
Introduction
You can use the external pins to connect more LEDs and have colours other than red.
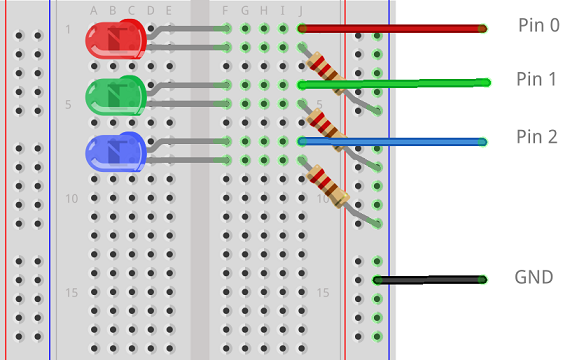
This project uses 3 LEDs. Each LED will need a resistor. Here I've used 220 Ohm resistors, one for each of the LEDs used.
Making The Circuit
The longer legs of the LEDs are the anodes or positive legs. These are the ones we connect to the micro:bit pins. The shorter legs are the cathodes, negative. They get connected to GND through a resistor.
Programming
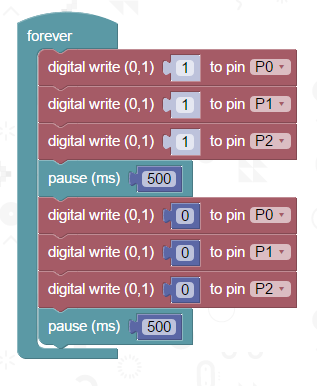
Turning the LEDs on and off is fairly straightforward. We use digital write to write a 1 or 0 to the pin, determining whether the LED is on or off. The following program makes all 3 LEDs blink on and off once a second,
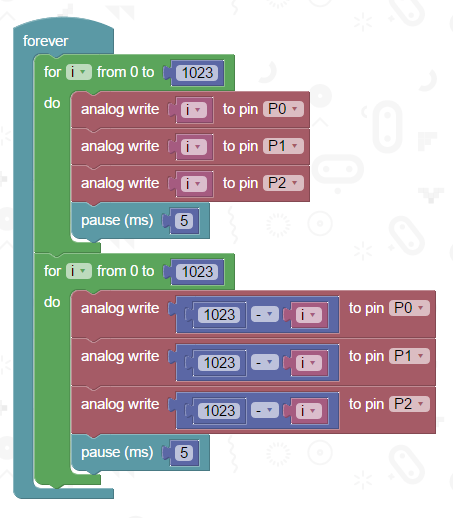
If you use analog write, instead of digital, you can vary the brightness of the LEDs. The following script uses loops to fade the LEDs in and out.
Challenges
- If you had 3 LEDs of the red, green and blue variety as I have used here, you have the makings of some traffic lights. You could use your other 3 GPIO pins to make a second set. Combine with a button for some traffic-themed simulation.
- With 4 LEDs, all of the same colour, you could make a program to count in binary for you.