BBC Microbit
![]()


BBC micro:bit
Compass
Introduction
The micro:bit has a built-in magnetometer. Magnetometers are used to sense the direction of the strongest magnetic force they feel. When combined with an accelerometer, they can be used give compass bearings.
If you've used a compass App on a smartphone, you'll know that you tend to have to calibrate the compass first by rotating the phone a few times. This is also true with the micro:bit and it happens automatically. You need to tilt the circuit board to move a dot on the matrix until you have made a circle. You might find this hard the first few times, but it does become quite straightforward after a while. If you have the appropriate battery supply, you might find this one easier than when connected via USB cable.
I'll leave it for you to work out how the reading relates to the exact orientation of the circuit board.
Programming
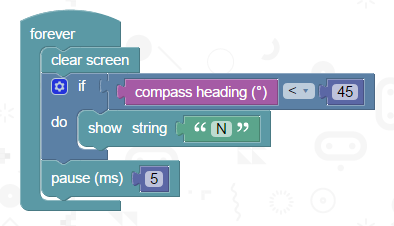
The following program shows an 'N' on the matrix when the compass is pointing 0-44°, from North to North East.
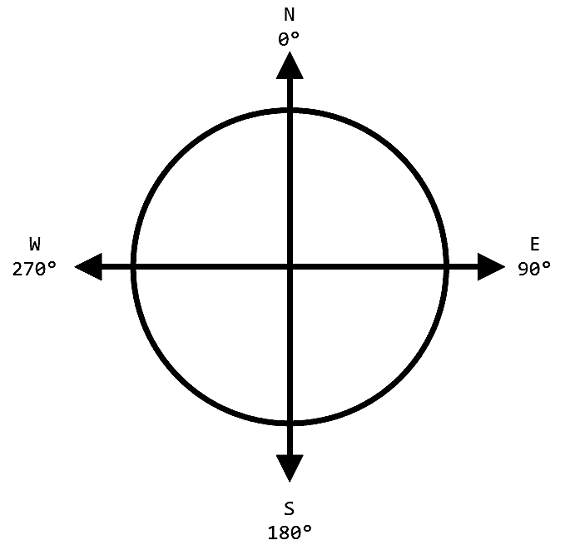
Extending the idea a little, we can make something a little more useful. Let's plan out that program now. Here is a diagram showing the points of the compass, with North shown at the top.
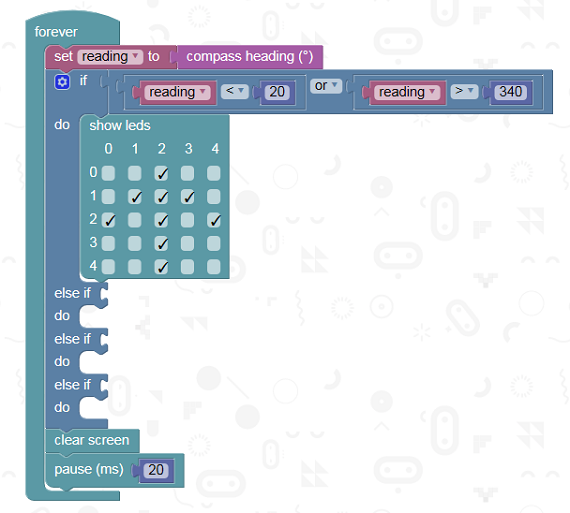
It's going to be tricky to hold the micro:bit still on the exact reading, so we can allow for a little slack. To start with, let's go with 20° either side of the exact figure. You can make a more refined version later. Here is a table of the logic that we need.
| Compass Point | Image | Logic |
|---|---|---|
| N | ↑ | reading < 20 OR reading > 340 |
| E | → | reading > 70 AND reading < 110 |
| S | ↓ | reading > 160 AND reading < 200 |
| W | ← | reading > 250 AND reading < 290 |
This is a starting point for the code that you need to do this.
Challenges
- You can carry on using the block editor with the compass to check for the other directions. If you want some greater flexibility, use one of the other two editors and make a fully operational compass.
- The trick with making a useful compass is to consider what to display at any time on the matrix. The example uses a 45° range for indicating North. That's fine for working out which of 4 directions something is facing, but not so useful if you were trying to follow a heading on foot. The error you would build up as you walk would be quite large. You could use a smaller range to indicate North, say 350 - 360° and 0 - 10°. If the board is not pointing North, you could use a + or - to indicate whether the user needs to rotate clockwise or anticlockwise.
- Having buttons that allow the user to get one of 4 or 8 compass bearings would make for a useful compass. Start with N, E, S, W as your headings and use the buttons to allow the user to choose a direction. Display the chosen letter when the user is pointing in their chosen direction or a + or - if not.