BBC Microbit
![]()


BBC micro:bit
Touch:bit Shenanigans
Introduction
The Touch:bit is a micro:bit accessory made by Pimoroni. It has 6 touch pads, each with its own LED.

To program the micro:bit, you will need to use an online editor. The one you need can be found at the following location,
https://makecode.microbit.org/
Now you need to add an extension so that you can get access to the blocks you need to use the Touch:bit.
Add The Touch:Bit Package
- Click on the settings cog (top right).
- Click on Extensions.
- Copy and paste the following link into the search box,
https://github.com/pimoroni/pxt-touchbit
and press search. - Select the Touch:bit library.
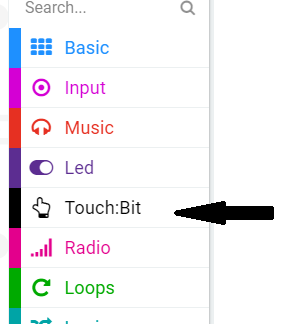
When you have done this correctly, you will see the Touch:bit category appear like you see in the image below,
Task 1
In the following example, the LEDs are set to automatically come on when their pad is pressed. This happens when the programming starts.
There are some event blocks used to detect when two of the pads are pressed and released. When the left pad is pressed, a left pointing arrow is shown. When the A pad is pressed, the letter A is shown. Releasing either of the pads clears the screen.
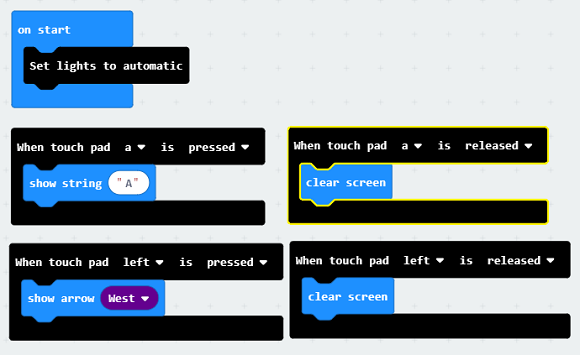
Your task is to complete the program so that there is a suitable letter or image for the other 4 pads.
Task 2
Design some simple animations and have them play when triggered when one of the pads is pressed. Don't add events for when the pad is released.
Task 3
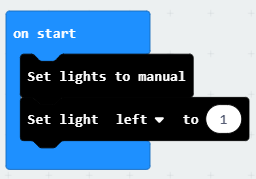
In the following program, the LEDs have been set to manual mode. That means that you can decide when they come on and off in your program. In the following example, the leftmost LED is turned on and off every half a second.
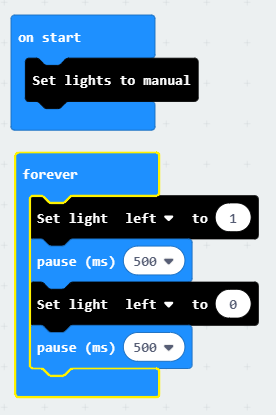
Your task is to make every other LED blink on and off at the same time. That means blinking LEFT, B and D.
Task 4
Adapt the program from Task 3 so that all 6 of the LEDs are blinking. Make it so that 3 are on at a time.
Task 5
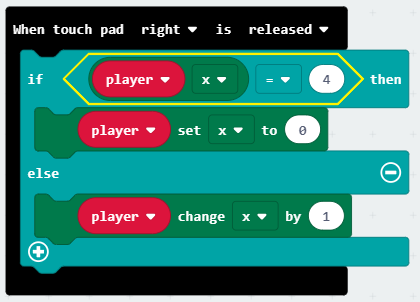
The following program allows you to use the left and right pads on the Touch:bit to move a dot left and right on the micro:bit LED matrix. Copy and test it.
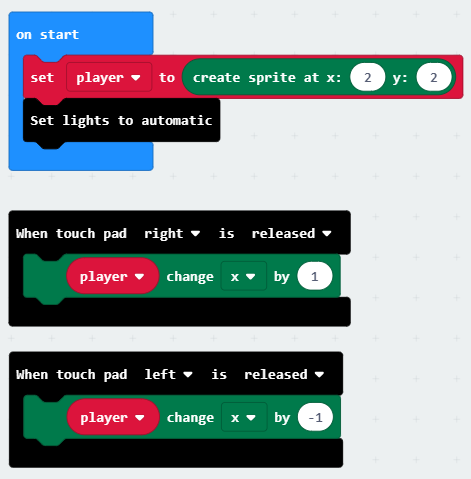
Your task is to add the events and blocks to use the A and D pads to move the dot up and down. You will need to change the Y value of the sprite rather than the X value.
Task 6
The following adjustment to the code from Task 5 allows the user to move the dot off the right edge of the screen and have it appear on the left.
Your task is to adapt your code from Task 4 so that going off the screen in any direction causes the dot to reappear at the opposite side of the screen.
Task 7
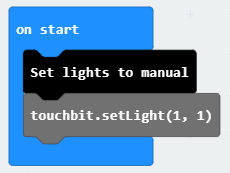
If you create the following program and press the JavaScript button, you will see the code shown below the image.
touchbit.lightModeManual()
touchbit.setLight(touchbit.TouchPad.left, 1)
When you create your program with the blocks, the JavaScript is what you are actually making.
Change the code so that, instead of saying touchbit.TouchPad.left, it says 1.touchbit.lightModeManual() touchbit.setLight(1, 1)
When you click on the Blocks button, you should see the following,
The block has changed colour and the dropdown box has disappeared. When you download the program though, it turns on the LED for pad A. The numbers of the pads go from 0 to 5.
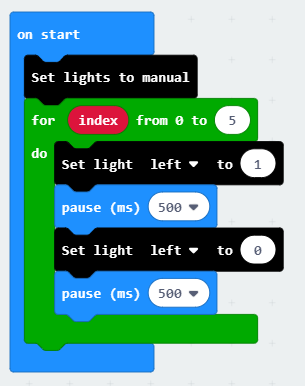
Knowing this means that we can do some cool things with the LEDs more efficiently. Start off with the following program,
Press the JavaScript button and then alter the code as follows,
touchbit.lightModeManual()
for (let index = 0; index <= 5; index++) {
    touchbit.setLight(index, 1)
    basic.pause(500)
    touchbit.setLight(index, 0)
    basic.pause(500)
}
Back with the blocks, you should see the following,
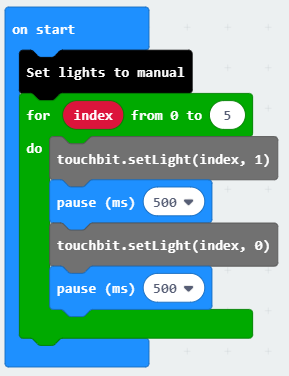
This is an efficient way to blink each LED on and off.
Finish off this task by moving the loop into a forever block so that the LED action carries on forever.
Task 8
Starting from the end of the last task, duplicate the for loop and all of the blocks inside it. Put them directly after the first for loop is finished.
Go to the JavaScript listing. In the second loop, change the setLight statements so that it reads, 5 - index instead of just 'index'. This should light up the LEDs in reverse order.