BBC Microbit
![]()


BBC micro:bit
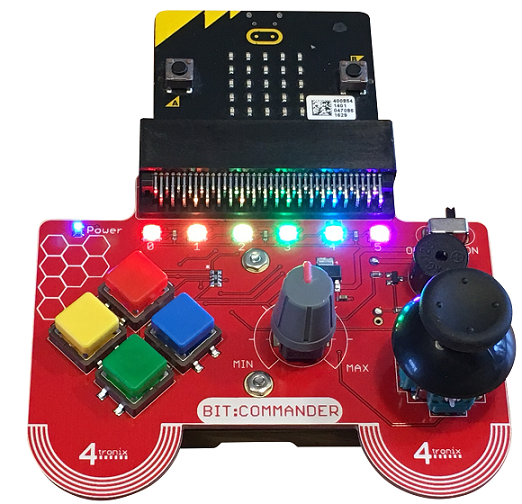
Bit:Commander - The Potentiometer
Introduction
The rotary potentiometer in middle of the board is connected to pin 0. It shares this connection with the buzzer. You have to be a little careful when using them both in the same project but, as long as you separate their use in your programs, you can do it.
The potentiometer centres with a little click and reads from 1 to 838 for me when I write the values back to my computer through the USB connection. The centre reads 312.
Programming
This was my first test program to get the readings. To be able to use this, you need a serial driver for the micro:bit installed. You also need to use a serial monitor. I used the one that comes with the Arduino software.
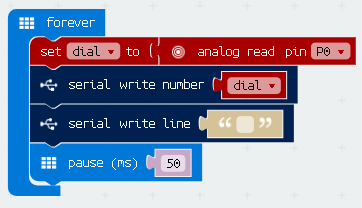
JavaScript
let dial = 0
basic.forever(() => {
    dial = pins.analogReadPin(AnalogPin.P0)
    serial.writeNumber(dial)
    serial.writeLine("")
    basic.pause(50)
})
There are a series of marks on the silkscreen around the potentiometer. The readings I got at each of these points were as follows,
- 1
- 128
- 261
- 312
- 384
- 513
- 838
With a slight tweak to those numbers, the position of the dial can be converted to an integer from 0 to 6. The following does just that, displaying the current reading on the matrix.
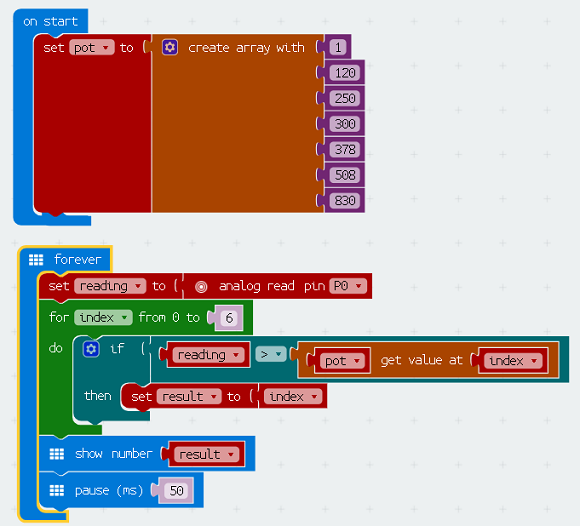
JavaScript
let result = 0
let reading = 0
let pot: number[] = []
pot = [1, 120, 250, 300, 378, 508, 830]
basic.forever(() => {

})
basic.forever(() => {
    reading = pins.analogReadPin(AnalogPin.P0)
    for (let index = 0; index <= 6; index++) {
        if (reading > pot[index]) {
            result = index
        }
    }
    basic.showNumber(result)
    basic.pause(50)
})