Other
Arduino - LED Projects
Arduino - Buzzer Projects
Arduino - Midi Projects
Arduino - Microview
Arduino - Other Projects
Arduino - Visual Basic.NET
Arduino - Tim's Projects
Arduino - Links
![]()


Wii Nunchuck
Introduction
The Wii Nunchuck was never intended to be used without a direct connection to a Wii Remote. In normal use, it draws its power from the remote and communicates with the Wii console via that device. It turns out to be a totally hackable device and can be connected up to any microcontroller that can communicate using the I2C protocol. I2C stands for Inter Integrated Circuit or something similar depending on who is using the term. It is a protocol for communication between 2 integrated circuits.
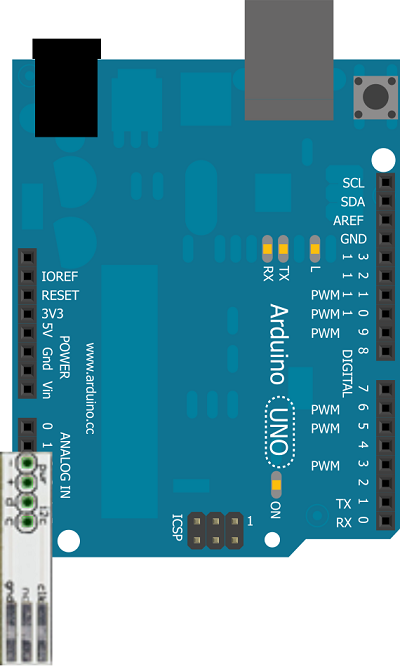
To use I2C on the Arduino Uno you will normally connect Power (5V or 3.3V, depending on the device) and GND as well as two further connections. The last two connections are SDA and SCL. SDA is the data connection and SCL is the clock connection. On the Arduino Uno, these are pins A4 and A5 respectively.
The purpose of the circuit and program on this page was to establish a clear idea of the values being returned when various parts of the Nunchuck were being used. VB was used rather than the Serial Monitor to avoid the issues with scrolling.
The WiiChuck adapter used for this project is a small PCB developed by Tod E. Kurt that breaks out the 4 pins described earlier and avoids the need to cut up the cables on a Nunchuck to make it possible to connect to the Arduino.
You Will Need
- 1 x WiiChuck Adapter
- 1 x Wii Nunchuck
Making The Circuit
This is the easiest breadboard layout you could get for a project.
Programming The Arduino
You will need to download a library class to work with the Nunchuck. The version used for this sketch can be copied from http://playground.arduino.cc/Main/WiiChuckClass. There are several libraries on this page - you will need the library that has been updated for Arduino 1.0 and which sets the power pins. This is the 4th one on the page. Copy the code and create a file called WiiChuck.h. When you have made the sketch, you will need to copy this file into the same folder as the sketch. Close and reopen your sketch and you will see 2 tabs in the Arduino IDE.
The sketch,
#include "Wire.h"

#include "WiiChuck.h"


WiiChuck chuck = WiiChuck();


void setup() {

  Serial.begin(115200);

  chuck.begin();

  chuck.update();

}


void loop() {

  delay(20);

  chuck.update();

  Serial.print((int)chuck.readAccelX());

  Serial.print(",");

  Serial.print((int)chuck.readAccelY());

  Serial.print(",");

  Serial.print((int)chuck.readAccelZ());

  Serial.print(",");

  Serial.print((int)chuck.readJoyX());

  Serial.print(",");

  Serial.print((int)chuck.readJoyY());

  Serial.print(",");

  Serial.print((int)chuck.buttonZ);

  Serial.print(",");

  Serial.print((int)chuck.buttonC);

  Serial.println();

}
It's a relatively simple sketch. All it does is read all of the available data from the Nunchuck and writes it to the serial port. Our VB program will pick this up. You can check that things are working at this stage by looking at the Serial Monitor.
The VB Program
Set up a Windows Forms Project and create a form with controls as you see below,
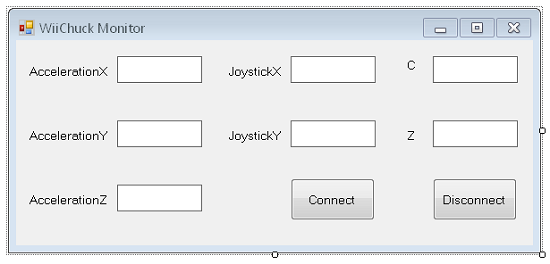
Apart from the two buttons, the rest of the controls are labels. The buttons are named btnConnect and btnDisconnect respectively. The other labels are named, lblX, lblY, lblZ, lblJoyX, lblJoyY, lblCB, lblZB - the logic of the naming should be pretty clear if you think about it for a second.
You will need an Imports statement at the very top of the code window,
Imports System.IO.Ports
The following global variables are needed,
Dim WithEvents sp As New SerialPort

Delegate Sub myMethodDelegate(ByVal [text] As String)

Dim myDelegate As New myMethodDelegate(AddressOf ProcessReading)
Now go to the properties for the Disconnect button and set the visible property to false.
Double click on the Connect button and write the event handler for it. You will need to change the COM port so that it matches the one your Arduino connects on.
Private Sub btnConnect_Click(sender As System.Object, e As System.EventArgs) Handles btnConnect.Click

   Try

      sp.BaudRate = "115200"

      sp.PortName = "COM3"

      sp.Open()

      If sp.IsOpen Then

         btnConnect.Visible = False

         btnDisconnect.Visible = True

      End If

   Catch

      sp.Close()

   End Try

End Sub
Double click on the disconnect button and write the event handler for it,
Private Sub btnDisconnect_Click(sender As System.Object, e As System.EventArgs) Handles btnDisconnect.Click

   Try

      sp.Close()

      btnConnect.Visible = True

      btnDisconnect.Visible = False

      Exit Sub

   Catch

      MessageBox.Show("Some kind of problem.")

   End Try

End Sub
The remaining code that you need is,
Private Sub SerialPort_DataReceived(ByVal sender As Object, ByVal e As System.IO.Ports.SerialDataReceivedEventArgs) Handles sp.DataReceived

   Dim str As String = sp.ReadLine()

   Invoke(myDelegate, str)

End Sub


Sub ProcessReading(input As String)

   On Error Resume Next

   Dim s() As String = Split(input, ",")

   lblX.Text = s(0)

   lblY.Text = s(1)

   lblZ.Text = s(2)

   lblJoyX.Text = s(3)

   lblJoyY.Text = s(4)

   lblCB.Text = s(6)

   lblZB.Text = s(5)

End Sub
Challenges
Once you get a grip on what kind of values are coming from the Nunchuck, you can start to think about how you might want to use it as a controller for a VB program or in an Arduino project. You will probably want to adjust the delay in the Arduino sketch so that it works nicely for whatever it is you are doing. Any program that has a limited range of inputs would be suitable.