Other
Arduino - LED Projects
Arduino - Buzzer Projects
Arduino - Midi Projects
Arduino - Microview
Arduino - Other Projects
Arduino - Visual Basic.NET
Arduino - Tim's Projects
Arduino - Links
![]()


Making Music 2
Introduction
This project won't sound particularly nice but it will allow us to control the tone of a buzzer in an interesting fashion. We will be aiming to make it so that the tone we get from the buzzer is affected by the proximity of our hand to the photoresistor.
You Will Need
- 1 x Piezo Buzzer
- 1 x Photoresistor
- 1 x Pushbutton
- 2 x 10 KOhm Resistor
- Jumper Wires
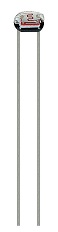
The photoresistor or light dependent resistor looks like this,
Making The Circuit - Tuning
Our first job is to work out the light levels we are receving from the photo resistor. When we read on the analog 0 pin, we get a figure from 0 to 1023. We need to work out what range our photoresistor is going to give us. Our first circuit will just be the photoresistor set up with a 10K resistor as you see below,

Programming The Arduino - Tuning
This first chunk of code is just to get the lowest and highest readings we get from the photoresistor.
int sensorPin = 0;

int minimum = 1023;

int maximum = 0;

void setup()

{

  Serial.begin(9600);

}


void loop()

{

  getlevels();

  delay(1000);

}


void getlevels()

{

  int light = analogRead(sensorPin);

  if (light<minimum)

  {

    minimum = light;

  }

  if (light>maximum)

  {

    maximum = light;

  }

  Serial.print("Light Now: ");

  Serial.print(light);

  Serial.print(" Min: ");

  Serial.print(minimum);

  Serial.print(" Max: ");

  Serial.println(maximum);

}
Run this and open the Serial Monitor (CTRL + SHIFT + M). Move your hand over and away from the photoresistor and you will see something like this,
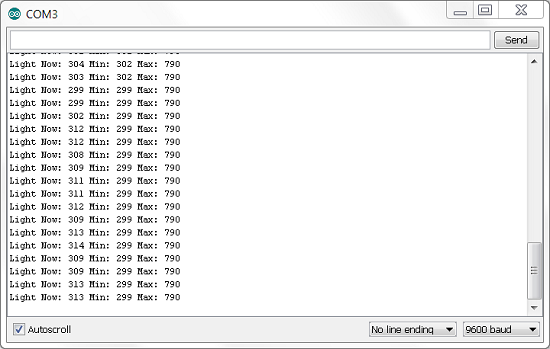
Notice that the number goes down when the photoresistor is receiving the most light and goes up when it is covered. The range doesn't extend to 0 - 1023 but somewhere in the region of 300 (light) to 800 (dark). The numbers may be different for you but won't be too far off this.
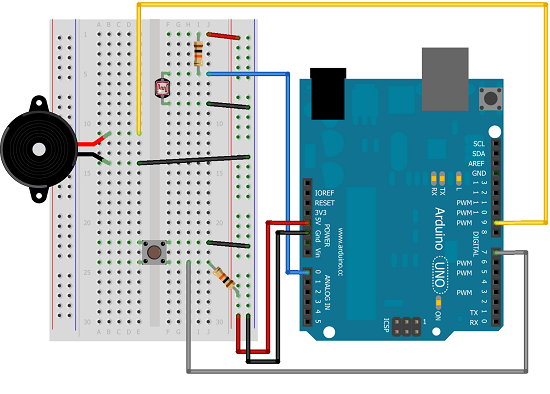
Making The Circuit - Buzzing Up
Add the buzzer and button to your circuit,
Programming The Arduino - Buzzing Up
int sensorPin = 0;

int buttonPin = 7;

int buzzerPin = 9;

void setup()

{

  pinMode(buttonPin, INPUT);

  pinMode(buzzerPin, OUTPUT);

}


void loop()

{


  int buttonState = digitalRead(buttonPin);

  if (buttonState==LOW)

  {

    int light = analogRead(sensorPin);

    // fix the value to our range

    light = constrain(light, 300, 800);

    // map our values onto the range

    // of tones we wish to use

    light = map(light, 300, 800, 400, 1200);

    // sound the tone

    tone(buzzerPin, light);

  }

  else

  {

    noTone(buzzerPin);

  }

  delay(10);

}
The interesting parts of the code are the constrain() and map() functions. First, we contrain the reading so that it can't fall outside of our expected range. Then we map that value onto the larger range of tones we want to use.
Challenge
When you test this, it does work as you expect. Clearly, you can tweak the range of tones produced to make higher and lower frequency noises when the button is pressed. It isn't the most tuneful thing in the world though.
Imagine what it would be like if it only sounded out the frequencies of musical notes. If you were to make an array of the frequencies of say, 20 notes and map the value onto a range of 0 - 19, you could make it so that the buzzer always sounded an actual note. If you are musical, you could choose your range of notes in a key or scale that you know might sound good.