Raspberry Pi Pico
MicroPython - Basics
MicroPython - More Involved
MicroPython - Pico W
MicroPython - micro:bit
MicroPython - Projects
CircuitPython - Some Basics
CircuitPython - HID Adventures
CircuitPython - Experiments
Other Pages
![]()


Raspberry Pi Pico
RGB LEDs
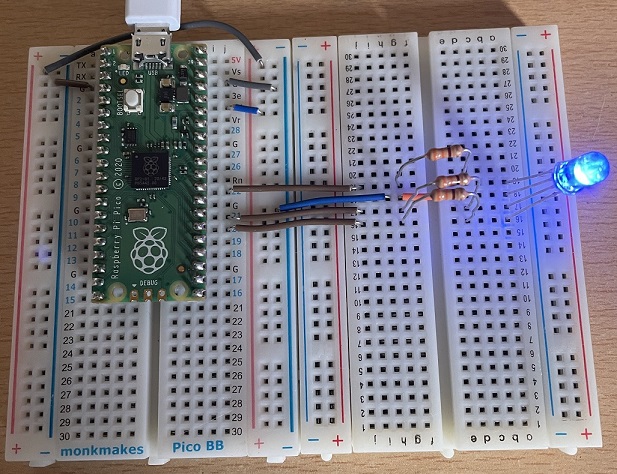
The RGB is a three-LED-in-one package. On this page a common cathode RGB LED is used. It has 4 pins. There is one positive pin (anode) for each of the red, green and blue LEDs that make up the package. The longest pin is the ground pin and is common to all 3 LEDs.
In this circuit I have used a second half-sized breadboard and placed the RGB LED on that. There is a 330 ohm resistor in line with each of the anodes. I have connected the anodes to GPIO pins 20, 21 and 22.
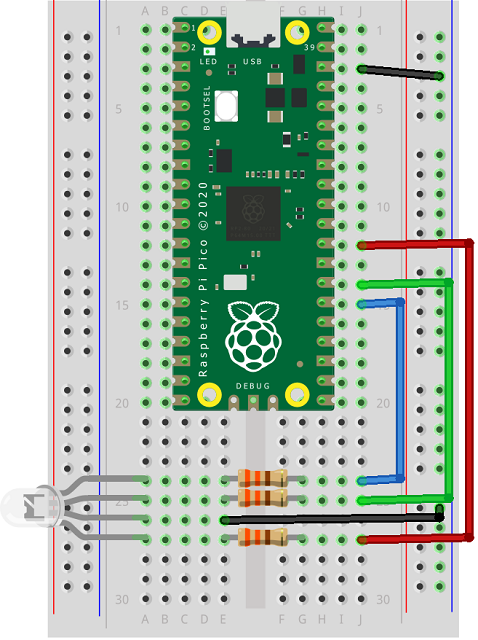
Here is a Fritzing diagram for the circuit, just without the extra breadboard.
The following program turns the three coloured LEDs on and off in turn.
from machine import Pin
from time import sleep

red = Pin(22, Pin.OUT)
green = Pin(21, Pin.OUT)
blue = Pin(20, Pin.OUT)

while True:
    red.value(1)
    sleep(0.5)
    red.value(0)
    green.value(1)
    sleep(0.5)
    green.value(0)
    blue.value(1)
    sleep(0.5)
    blue.value(0)
    sleep(0.5)
The magic with RGB LEDs is that you can use PWM on each of the coloured LEDs to mix different colours. The effect is not perfect but does mean that you can get a lot more than just three colours.
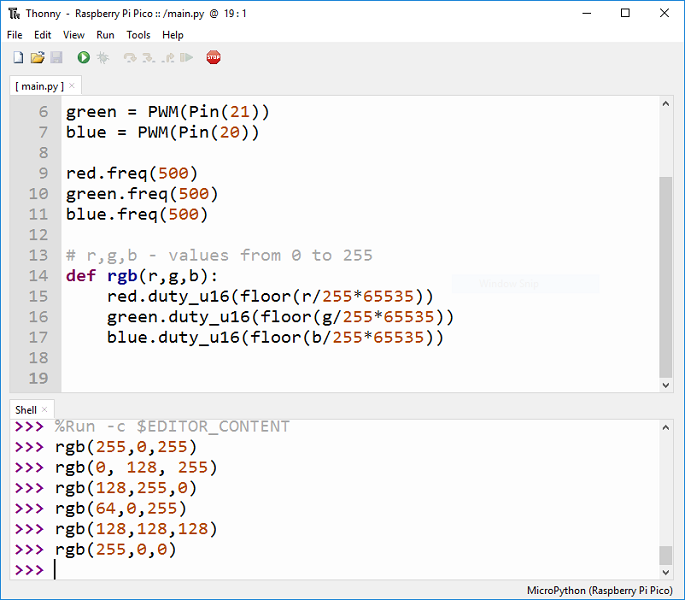
In this program, there is a subroutine used to mix different values for red, green and blue to make new colours. The arguments for the subroutine are scaled from 0 to 255 to match the values that you would use for colours on computer screens.
from machine import PWM, Pin
from time import sleep
from math import floor

red = PWM(Pin(22))
green = PWM(Pin(21))
blue = PWM(Pin(20))

red.freq(500)
green.freq(500)
blue.freq(500)

# r,g,b values from 0 to 255
def rgb(r,g,b):
    red.duty_u16(floor(r/255*65535))
    green.duty_u16(floor(g/255*65535))
    blue.duty_u16(floor(b/255*65535))
With this program on the Pico, you can write calls to the subroutine in the shell and see the colours you get. For example,