Visual Basic 2005 Guide
Getting Started
Going Further
Databases
HTML Editor
Future Directions
![]()


Visual Basic 2005 Guide
Drawing Graphics
Introduction
Visual Basic 2005 has an enormous set of managed code for dealing with graphics. This page is only a gentle introduction to the topic. Because the topic is so vast, you will always end up using references to find the features that you need to use. The section of the local help that you can use is called Getting Started with Graphics Programming.
Getting Started
In this program we will learn how to create a graphics object to draw some shapes on a picture box control.
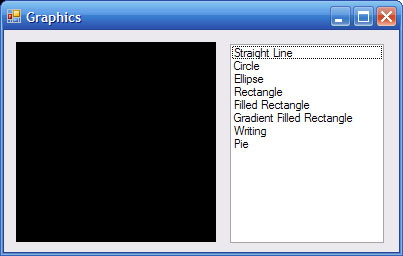
Start a new project and add a form with a picture box called picShapes which is exactly 200 pixels square and has its background set to black. Add a listbox called lstShapes and add the items shown in the screenshot below.
Drawing A Line
Double click on the list box and make sure you are typing this code into the SelectedIndexChanged event handler. Type the following line first,
Dim g As System.Drawing.Graphics = picShapes.CreateGraphics()
The variable g will now be a reference to the graphics object that represents the drawing surface of the picture box.
We can use the Select Case structure to draw different things depending on the user's selection. We will start by drawing a simple straight line in white.
Select Case lstShapes.SelectedIndex

   Case 0

      g.DrawLine(Pens.White, 5, 100, 195, 100)

End Select
There are variations on how to use this function, but it has been used in the example with the following parameters,
DrawLine(Pen, x, y, x1, y1)
For more information on Pens and their different uses, check the help. The intellisense (the stuff that pops up) makes this object easy to create as you type. X and Y are the coordinates of the start of the line starting from the top left hand corner of the picture box. X1 and Y1 are the coordinates of the end point of the line.
Drawing Circles & Ellipses
The format for drawing an ellipse is as follows,
DrawEllipse(Pen, x, y, width, height)
To draw a circle, make the height and width the same. For example,
g.DrawEllipse(Pens.White, 5, 5, 190, 190)
Or draw the ellipse, damn it.
g.DrawEllipse(Pens.White, 5, 40, 190, 120)
Add these examples as Case 1 and Case 2 in your Select Case Structure.
Drawing A Rectangle
DrawRectangle(Pen, x, y, width, height)
For example,
g.DrawRectangle(Pens.White, 5, 5, 190, 190)
Add this code and try it out.
Filling Shapes
The DrawRectangle and DrawEllipse methods both have counterparts, FillRectangle and FillEllipse. The only difference is that you use a brush rather than a pen for filling shapes. You can get the same help from the intellisense and do a bit more with a brush.
For example, to draw a filled rectangle,
g.FillRectangle(Brushes.White, 5, 5, 190, 190)
To draw an outlined version , draw a rectangle over the top using a different pen.
You can make fancy gradient brushes too. Try the following,
Dim rect As New Rectangle(5, 5, 190, 190)

Dim lb As New LinearGradientBrush(rect, Color.Gold, Color.Silver, LinearGradientMode.Horizontal)

g.FillRectangle(lb, rect)
You can obviously monkey around with some of the parameters here.
Writing Text
The following example creates a font object and uses it to display formatted text in a rectangle whose top left corner is the point 5, 95.
Dim f As New Font(New FontFamily("Verdana"), 12, FontStyle.Regular, GraphicsUnit.Pixel)

g.DrawString("Whatever!", f, Brushes.White, 5, 95)
Pies
My favourite functions are the DrawPie and FillPie functions.
The formats for the functions is
DrawPie(Pen, x, y, width, height, startangle, sweep)
The start angle is the angle between the x axis and the first edge of the pie slice. Things move in a clockwise fashion. The sweep angle determiens the size of the slice. The FillPie function uses a brush rather than a pen.
The following lines of code make a mini-pie chart.
g.FillPie(Brushes.Gold, 5, 5, 190, 190, 0, 90)

g.DrawPie(Pens.White, 5, 5, 190, 190, 0, 90)

g.DrawPie(Pens.White, 5, 5, 190, 190, 90, 270)

g.FillPie(Brushes.Silver, 5, 5, 190, 190, 90, 270)
Alternative Way Of Creating A Reference To The Graphics Object
If you minimise the example program from this page when it has a graphic in the picture box, when you restore the window the graphic is gone. This is because anything that requires the form to redraw its controls will draw the picturebox as it was at design time. There is a way around this.
If you add your drawing code to the Paint event of a control, you can create a reference to the graphics object in the following way,
Dim g As Graphics = e.Graphics
Your drawings will then be redrawn along with the rest of the control.
Programming Challenges
1. Add some funky shapes of your own to the program whilst you learn a few tricks. How about using some loops to draw some pretty pictures?
2. Write a simple game that challenges the user to stop an expanding pie slice at a given angle.
3. Write an application that allows a user to enter a series of data items and values that are then represented in a pie chart. For an additional challenge, add a legend and/or make it possible for the user to save the chart as a bitmap to use in other programs.
4. If you are comfortable with basic trigonometry in right-angled triangles, you could write a simple clock program with moving hands. By creating a timer which calls the refresh() method of the picture box into which you are drawing you can animate a second hand and ensure that the correct time is always displayed.