MakeCode Arcade
Game Tutorials
![]()


Running & Jumping
Introduction
This game is a suitable place to start in your journey into MakeCode Arcade. It is a simple platform-type game with a character that runs constantly to the right. The game is over relatively quickly but can be filled with interesting things to make it worth playing. It also allows you to practise some basic design concepts.

Create Hero Function
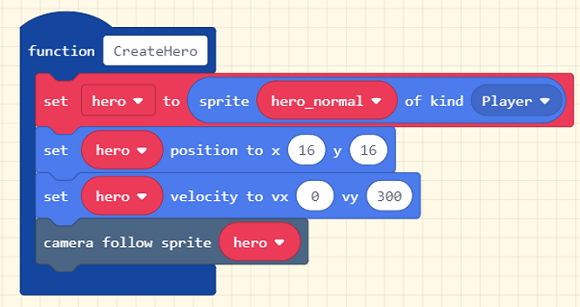
Set up a new project in MakeCode Arcade. We're going to make our game as a series of functions. This helps to make the code more readable by breaking our program into lots of small chunks of code, each one carrying out a set of tasks. You can find the blocks for functions by clicking on Advanced.Create the following code,
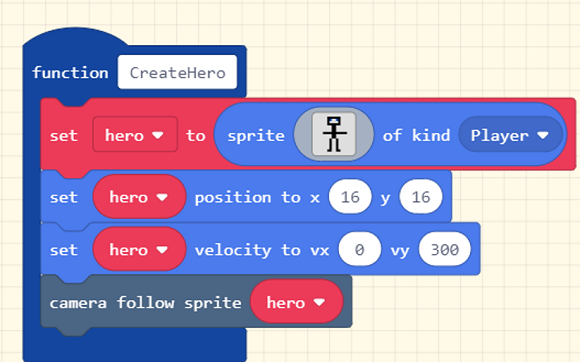
You can find the set block that you need in the sprites section. The camera follow block is in the scene section. This code generates a sprite for our player character, positions it on the screen, sets the downward velocity and makes it so that the camera will follow the player to the end of the game.
Setting The Scene
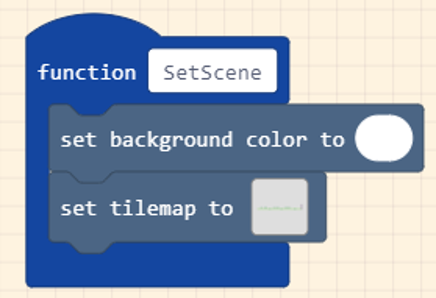
Make sure that you actually choose white as the background or you may not be able to see your sprite.
Click on the square in the tilemap block to design your level. I went for a 64x8 tilemap. Your level might look something like below. You need three elements,
- Floor
- platforms
- end zone.
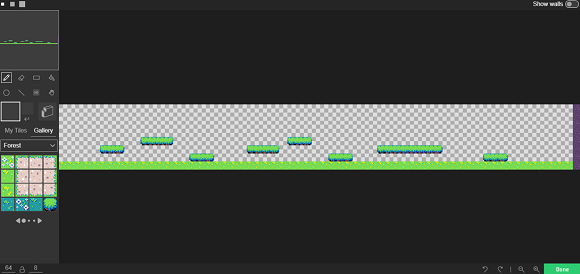
The Draw Walls tool is used to draw over the top of each tile to make them into walls. The technique to use here is to start by drawing the level the way you want it to look. Then go to add the walls that you need.

Test So Far
We need to test the game repeatedly whilst we make it and make adjustments when things are not to our liking.
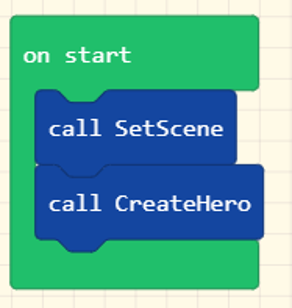
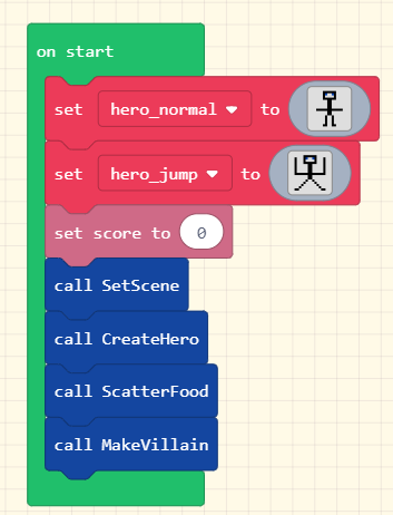
There will be more screenshots showing the On Start block later in the guide. You can only have one of these events in your game. Don't add a second one - just edit the one you already have.
Moving & Jumping
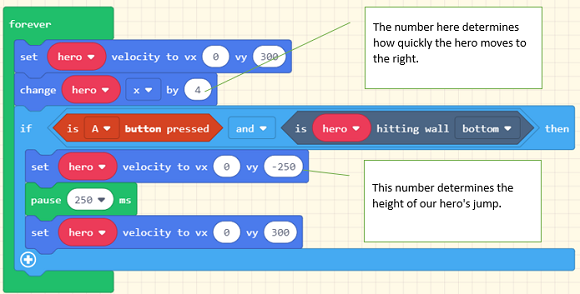
The character is only able to jump if it is on top of a wall.
Food
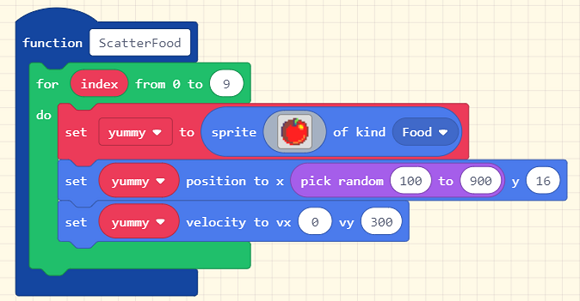
This code scatters 10 food items along the length of the level.
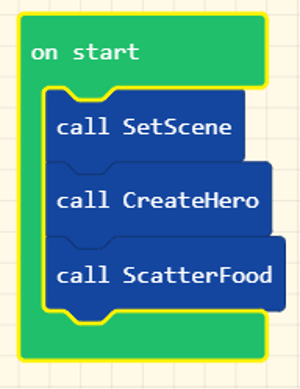
Test That Food Appears
Add the call ScatterFood block to the end of the On Start that already exists. You will see food in the game but will not be able to eat it. Nooooo.
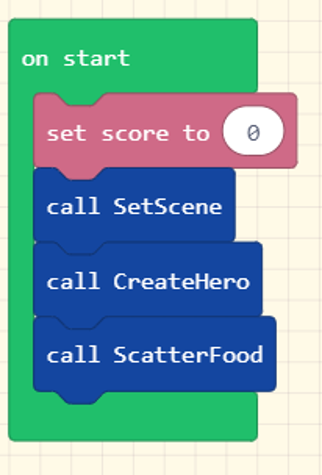
Eat Food, Be Happy
Change the On Start to make sure that the score is set to 0.
Add the following,
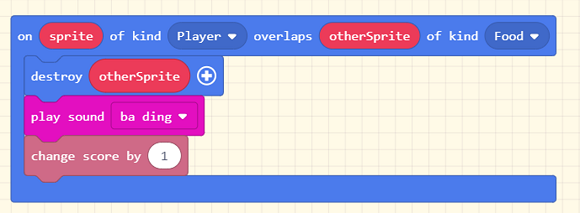
The othersprite is not a normal variable. Don't create this variable. Drag the block from the function into the space where you need it.
Test the game again.
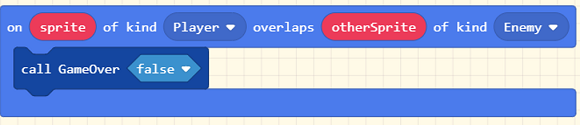
Villain
The villain is placed once in the game to give the player something to avoid.
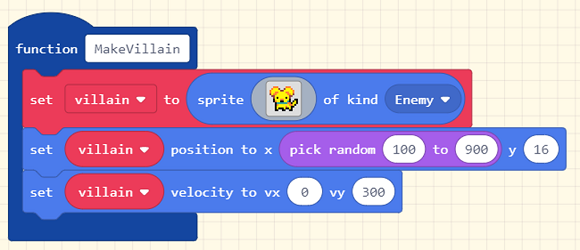
To test that the villain appears, amend the On Start event again.

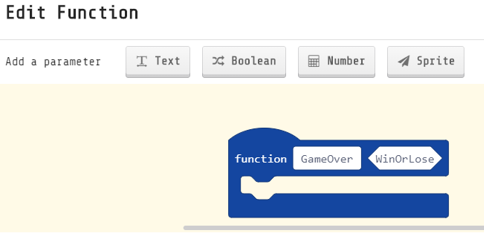
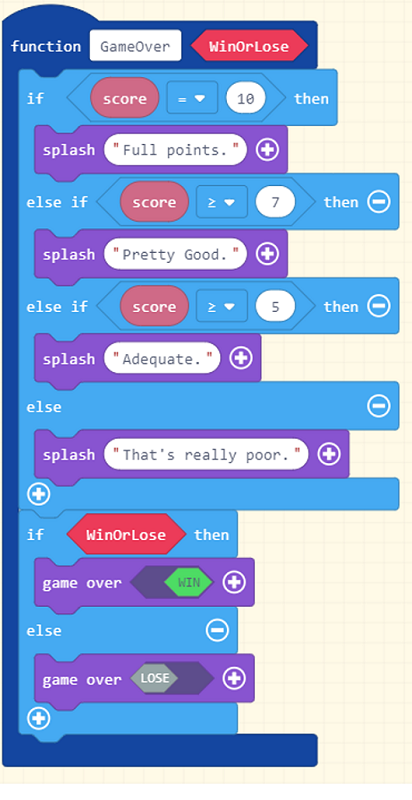
GameOver Function
To make this function correctly, click the Boolean button and type the name of a parameter.
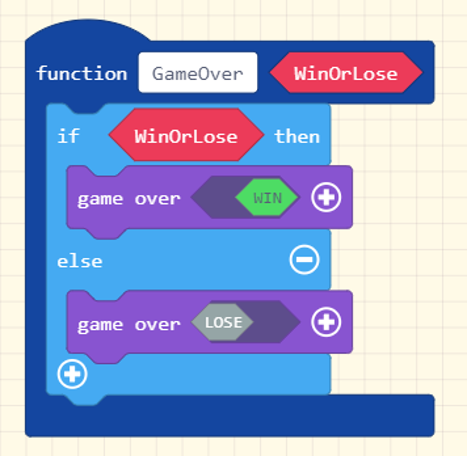
The IF statement allows us to use one function to end the game as a win or a loss for the player.
Losing
Winning
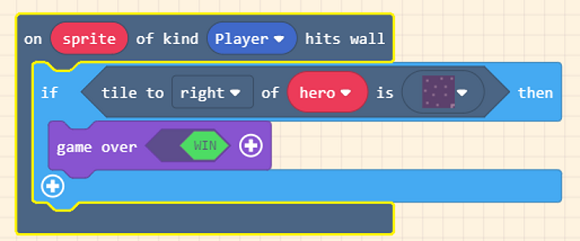
The tile mentioned here is the tile that was used for the wall at the end of the level.
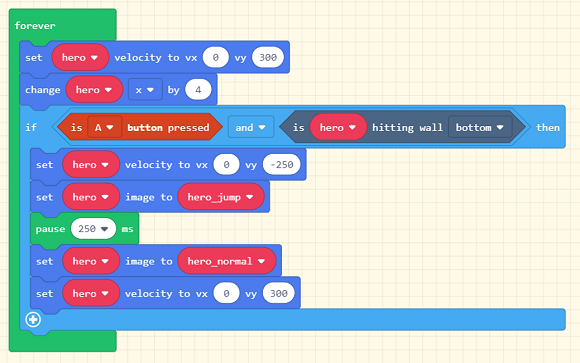
Enhancement 1 - Jumping Sprite Changes
The following are changes made to three of the chunks of code that you already have. Do not add these from scratch, adapt the code that you have.
Enhancement 2 - Feedback
Adapt the GameOver function to include feedback for the player. The feedback changes depending on the player's score.
Challenging Extensions & Adaptations
- Make some poison food (you can set the 'kind' of a sprite to a word that you choose). Lose one score for each of these that you pick up.
- Make a 'shadow' character. Work out how to make him jump when it is hitting a wall on its right. You could allow it to pick up food too. At the end of the game, work out whether you or the shadow have collected the most food. You will need a variable to store how many items that the shadow character collected.
- You could add more levels to the game or design a larger level to start with.