MakeCode Arcade
Game Tutorials
![]()


MakeCode Arcade
Introduction
Microsoft MakeCode Arcade is a web-based programming language using focused on making arcade games that can be compiled for hardware. You can use blocks or JavaScript to create programs that can be downloaded to a compatible device and played. You can also save your programs during development and continue to work on them at a later date. You can also just write and play them online using the simulator on the development web site.
The programming language has lots of libraries for common arcade game elements - sprites, collisions etc. It also has plenty of programming constructs to allow you to write efficent and creative programs. In general, I get more entertainment out of writing code than I do for playing the games. It works best for fairly short but complete ideas and, with some work, you can get a pretty decent game going.
This section of the web site has some sample games, showing a little of what you can do, a few techniques that can be used in your games and some ideas to keep you busy for a while. I have chosen not to include any source files in the site - you have to make the games and adapt them yourself to enjoy them. My versions have relatively poor drawings and many could do with some tweaks to the key numbers to make them run a little better.
Hardware
The basic specification for hardware that can run MakeCode Arcade is as follows,
- An ARM Cortex M microcontroller.
- A 160x120 pixel display - colour.
- 4 directional buttons, 2 action buttons (A and B), 1 utility button (menu/select/pause), 1 reset button.
- A buzzer or sound output.
- USB connector for programming and power.
I have a handful of compatible devices - a few are shown below with comments. They cost from around £24 to around £36 and can be found for sale on the sites of UK suppliers.
Meowbit
The oddly named Meowbit is on the stranger end of the range but has quite a few features that make it an appealing option. It comes with the rubber case and there's more hardware stuffed into the board than I have managed to use. It can be programmed in MicroPython and some other online tools as well as in MakeCode.
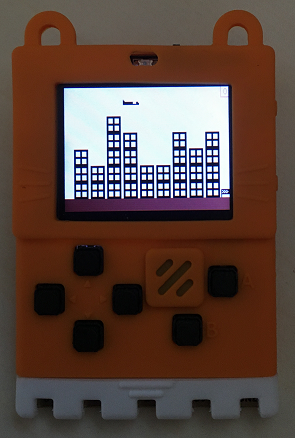
The bottom of the board is a micro:bit style edge connector which can be plugged into micro:bit accessories.
What I like most about this one is that it can run from a LIPO battery, which it will also recharge for you when plugged into a USB port. A small LIPO can be hidden inside the rubber case giving you a really portable setup.
Adafruit PyBadge LC
The PyBadge LC is an Adafruit product. Like all of their stuff, it is beautifully made. The LC in the name stands for 'low cost'. It has a more expensive, fuller featured cousin which I didn't get. This is probably the cheapest way to get started.
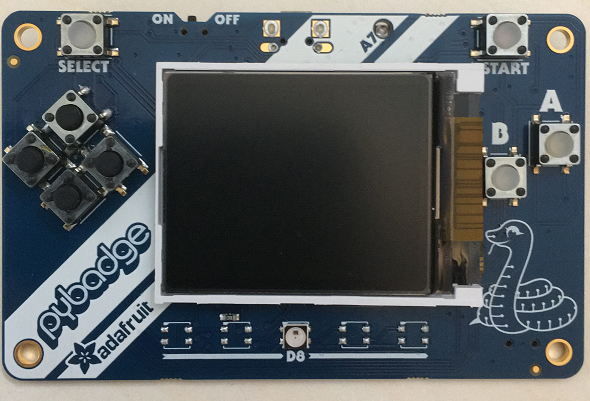
Like the Meowbit, it can run off and charge a LIPO. It doesn't come with a case but you could 3D print one if you have access to a printer at school or in a maker space.
Adafruit EdgeBadge
When used for MakeCode Arcade, the EdgeBadge is similar to the full-featured PyBadge. It does have some additional hardware that can be used for machine learning. I like it because I can use it for both.
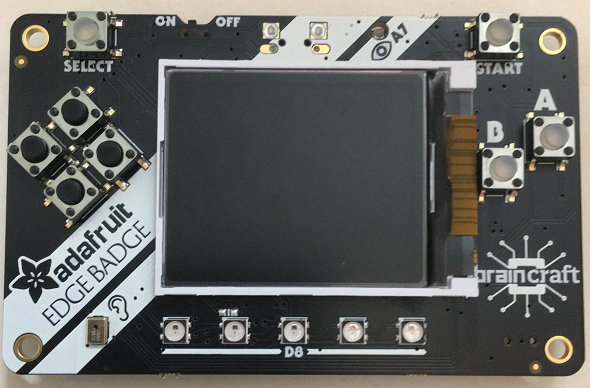
It has nice buttons, some Neopixels and can do LIPO charging for you.
Kitronik Arcade For MakeCode
For actually playing games, the Kitronik Arcade is quite hard to beat.
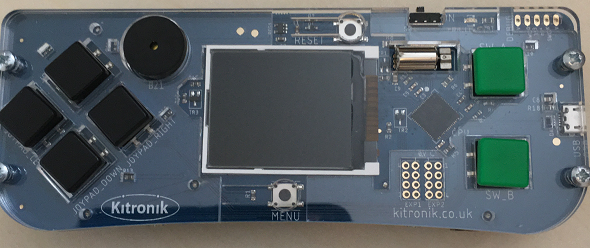
It comes with a laser-cut acrylic case to protect the electronics and has the batteries (3xAA) positioned neatly to act as ergonomic grips. It's a fairly large unit and that works nicely for playing.
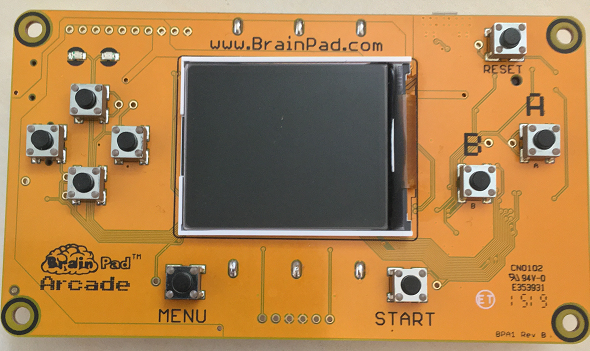
Brainpad Arcade
This was one of the earliest compatible devices and is made by GHI Electronics.
Other Options
The first method I used for MakeCode Arcade was to build my own circuit. I followed this guide from the Adafruit web site and used an Itsy Bitsy M4.
One really nice option is to use a Raspberry Pi Zero and an Adafruit Joy Bonnet. Again, Adafruit have made a helpful guide. The nice thing about this is that you can play your games on an HDMI monitor/TV. You can also store a load of games on the SD card and easily switch between them. If you replace the Joy bonnet with joysticks and arcade buttons, you can build your own solution, depending on your DT skills.