Twisting Puzzles
Puzzle Menus
![]()

Twisting Puzzles
Bandaged Cube (One Face) - Hints & Algorithms
Introduction
The bandaging pattern of this puzzle makes it hard to use software to search for algorithms. My other two bandaged cubes use bandages that can be placed on the puzzle so that turns of 3 or more faces can be made throughout an algorithm. With this bad boy, every turn locks and unlocks all sorts of combinations of other turns. The approach explained here can be summarised as follows,
- Solve The Bandaged Layer
- Orient The Bottom Layer Corners
- Permute Bottom Layer Corners
- Position Bottom Layer Edges
- Cycle Middle Layer Edges
- Untwist Middle Layer Edges
Step 1 - Solve The Bandaged Layer
You should be able to do this intuitively. It isn't too tricky to find a way to get the pieces into position.
Step 2 - Orient The Bottom Layer Corners
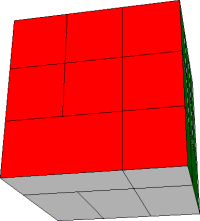
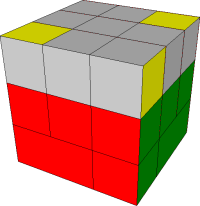
From this point onwards, I work with the top layer on the bottom, bottom layer on top. One of the corners of the bandaged layer is not bandaged to any other pieces. I always have that in the front-right-down position before and after any algorithms are executed. In the image below, the red face would be front. The cube is tilted forwards to show the bandaged pieces now on the bottom of the puzzle.
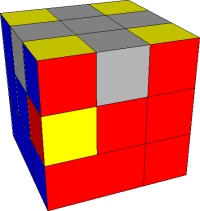
The following Ortega cases can be solved outright with the algorithms shown. The other 3 cases are a little trickier. Fortunately, the second two algorithms (which are the inverse of one another) can be executed on those cases and will produce one of these 3 cases. You can work out the route to that yourself.
| Orient 4 | Orient 2 | Orient 2 |
|---|---|---|
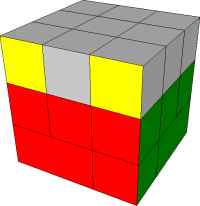 | 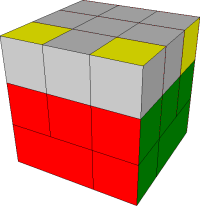 |  |
| R2 U2 R U2 R2 | R U R' U' F' U' F | F' U F U R U' R' |
Step 3 - Permute Bottom Layer Corners
The following algorithm swaps two top corners of the right face. Place two corners you want to swap on the R face and give the following a go,
R2 U R2 U' R2 F2 U' F2 U F2 U'
To swap corners diagonally, do this twice.
Step 4 - Position Bottom Layer Edges
The edges of the bottom layer can be inserted into their correct places one edge at a time using the following algorithms. Clearly, they can also be used to displace pieces that are twisted in position or out of position.
| FL - UF | FR - UF |
|---|---|
 | 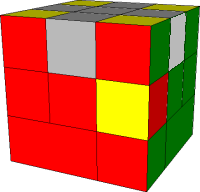 |
| U2 R2 U2 R U' R' D' F2 D R U R' | R2 U2 D' F2 U' D R' U R U2 R' U' R' U' |
Step 5 - Cycle Middle Layer Edges
If you think carefully about how you position the bandaged pieces, you should be able to move the middle layer edges into position. The algorithms for this can be found on the Corners-first solution to the cube if you don't know them. This shouldn't be too hard to do.
Step 6 - Untwist Middle Layer Edges
You'd be forgiven for thinking that, having placed the edges on the bottom layer, everything would be plain sailing. The normal positioning algorithms are absolutely fine - the problem is dealing with the twisted edges.
After much trying, I just couldn't find a simple enough algorithm that would untwist the edges in situ. The algorithms from step 4 twist some of the middle edges that they don't move. I had some luck using these to untwist the pieces but it is slow and has a little too much going on for me to be able to keep track. After a while, I came up with the following approach,
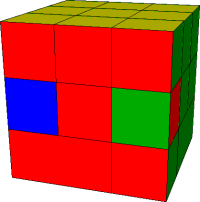
Firstly, do whatever is needed to get two twisted pieces next to each other. Place these on the front face at FR and FL and do the following algorithm,
R' F L D' F' D2 F' D' R F L' U F2 U
This algorithm swaps the two edges over without any twisting, making three squares of the same colour on the face (in this case red). It also swaps the UF and UB edges over too. This sets up a situation that is quite easy to solve. The following algorithm swaps and untwists the middle layer edges of the right face whilst also swapping the UF and UB edges back into position.
R2 U2 R2 U2 R2 U2
If you had 4 twisted corners at the end, you will need to do this whole step twice (both algorithms).