Twisting Puzzles
Puzzle Menus
![]()

Twisting Puzzles
Bandaged Cube (Fused) - Solution
Notation
The letters represent clockwise rotations of one of the cube faces. If you need to turn the face anticlockwise, there will be an apostrophe after the letter.
For example, R U' R' means rotate the right face 90° clockwise, rotate the upper face 90° anticlockwise, rotate the right face 90° anti-clockwise.
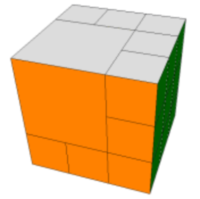
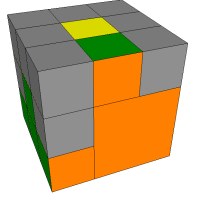
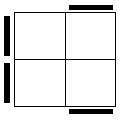
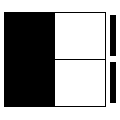
Step 1- First Layer
The aim of this step is to solve a layer which contains the bandaged piece. In the image below, the white layer would be suitable for that purpose.
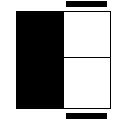
Step 2 - Middle Layer
The bandaging restricts you to turns of 3 faces only. As you rotate the cube, the faces you can turn change to another 3. This means that F2L algorithms need adjusting a little.
Turn the cube over so that the bandaged piece is on the bottom face. You have 3 middle edges to place (one is in the bandaged block).
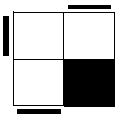
Left Of The Bandage
| L Colour Showing | F Colour Showing |
|---|---|
 |  |
| L U L U L2 U' L' U' L' | L U2 B L' B' U2 L' U' |
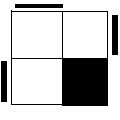
Right Of The Bandage
| R Colour Showing | F Colour Showing |
|---|---|
 |  |
| R' U' R' U' R2 U R U R | R' U2 B' R B U2 R U |
Last Edge
The last edge does not connect to any of the faces containing the bandage. This means that you should be able to place the last edge with your normal F2L algorithms.
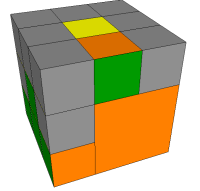
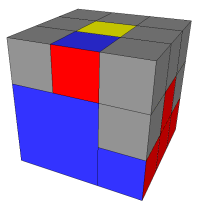
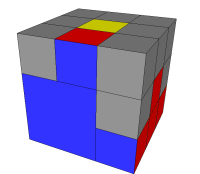
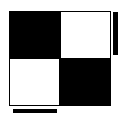
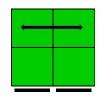
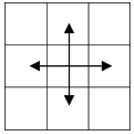
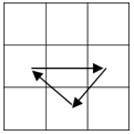
Step 3 - Orient Bottom Edges
Place the bandaged block so that F, R & U turns are possible. Cycle through the states shown in the images, using the same old algorithm from the beginner's method.
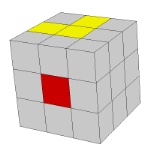
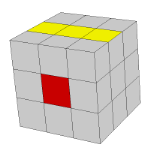
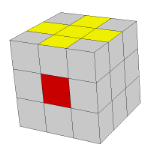
F R U R' U' F'
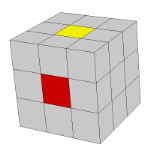
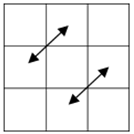
Step 4 - Orient Bottom Corners
Work out which case you have by looking at the corner positions. These algorithms will not disturb the edges that you have oriented. All of the algorithms require R & U turns and sometimes F. Place the bandaged block so that these turns are possible. Then execute the algorithm.
| 0 Oriented | 0 Oriented | 1 Oriented | 1 Oriented |
|---|---|---|---|
 |
 |
 |
 |
| R' U2 R U R' U' R U R' U R | R U2 R2 U' R2 U2 R | U2 R' U' R U' R' U2 R | R' U2 R U R' U R U2 |
| 2 Oriented | 2 Oriented | 2 Oriented |
|---|---|---|
 |
 |
 |
| R' U' R U' F U' R' U' R U F' | U' R' U2 R F' R' F U2 F' R F | F' R' F U2 F' R F R' U2 R |
Step 5 - Permute Bottom Corners
Assuming that the corners of the top layer were placed correctly, there are only two cases (other than solved) that can occur with the bottom layer corners. As before, place the bandaged block so that F, R & U turns are possible. Replace these algorithms with your own PLL edge-swappers if you need to.
| Horizontal Swap | Diagonal Swap |
|---|---|
 |  |
| F R' U' R F' R' U2 F U' F' U' R | R U' R U F R F2 U F U' F R' F' R' |
Step 6 - Permute Bottom Edges
The cube can now be solved with edge-swapping algorithms. The following all work if you place the bandage so that F, R & U turns are possible.
| Swap Adjacent Pairs | Swap Opposite Pairs |
|---|---|
 |  |
| R U R' U R' U' R' U R U' R' U' R2 U R U2 | F R' U2 R F' R' F U F' U' R F U' R' U' R F' |
| Clockwise 3-Cycle | Anti-Clockwise 3-Cycle |
|---|---|
 |  |
| R2 U R U R' U' R' U' R' U R' | R U' R U R U R U' R' U' R2 |